Create a new project, or download the zip file/clone the repo from here. I've chosen to start with a new project targeting API 15 and up, including Kotlin support and the AndroidX libraries.
Side note: you could just create a C++ project at the Activity selection screen. That's not the goal here though. I'm looking more to integrate C code into an existing project. If you're starting a brand new project then by all means, use the wizard to handle all of the magic for you.
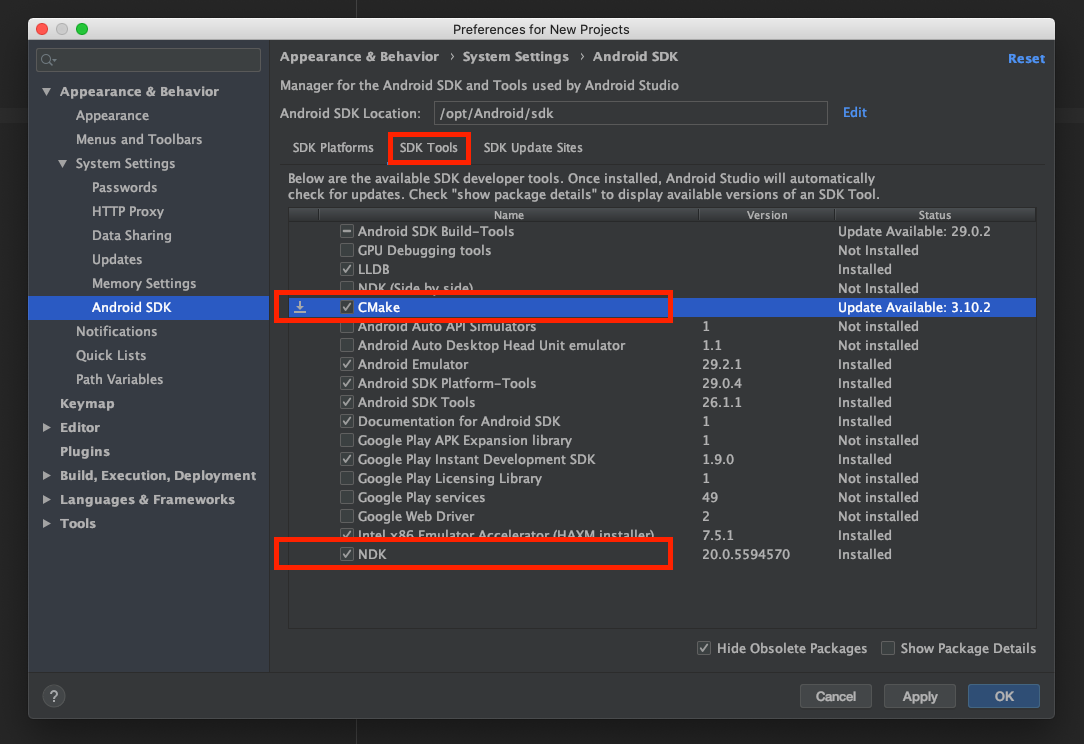
Step 0: Install Necessary Tools
Go to the SDK Manager and make sure you've got the NDK and CMake packages installed.
Step 1: Configure Gradle for Native Builds
In app/build.gradle, add the following lines:
android {
    // …
    defaultConfig {
        // …
        externalNativeBuild {
            cmake {
                cppFlags ""
            }
        }
        // …
    }
    // …
    externalNativeBuild {
        cmake {
            path "src/main/c/CMakeLists.txt"
            version "3.10.2"
        }
    }
    // …
}
Make the directory app/src/main/c and create a CMakeLists.txt file in there. Paste in the following code:
# Set the minimum required version for cmake
cmake_minimum_required(VERSION 3.4.1)

# Define our native library
add_library(
           c-verter
           SHARED
           c-verter.c )

# Include the Android logging library for native code
find_library(
            log-lib
            log )

# Link our library with the Android logging library
target_link_libraries(
                     c-verters
                     ${log-lib} )
Step 2: Add the C Code
Now create the app/src/main/c/c-verter.c file. Inside that file, we'll insert the logic for the conversions:
#include <jni.h>

JNIEXPORT jdouble JNICALL
Java_com_wbrawner_cverter_ConversionHelper_celsiusToFahrenheit(
    JNIEnv* env,
    jclass classInstance,
    jdouble celsius
) {
    return return celsius * 9/5 + 32;
}

JNIEXPORT jdouble JNICALL
Java_com_wbrawner_cverter_ConversionHelper_fahrenheitToCelsius(
    JNIEnv* env,
    jclass classInstance,
    jdouble fahrenheit
) {
    return (fahrenheit - 32) * 5/9;
}
There's a lot going on here, so let's break it down a bit more. First, we import the JNI header file:
#include <jni.h>
This is required to enable the C \<> Java interactions. We then begin to define the function:
JNIEXPORT jdouble JNICALL
This line declares that the function we're defining is intended to be used by the JNI, and will return a Java double. In this case, a jdouble is basically the same thing as a C double, so we don't need to do any kind of special conversion. The same is not true for things like Strings though (we'll cover those later.) Now for the actual function declaration:
Java_com_wbrawner_cverter_ConversionHelper_celsiusToFahrenheit(
    JNIEnv* env,
    jclass classInstance,
    jdouble celsius
) {
    return celsius * 9/5 + 32;
}
The function name must begin with Java_ (even if your class is in Kotlin, in the src/main/kotlin directory), and the rest must be the fully-qualified name of the class and method that we will declare in Java or Kotlin. The first two parameters are also required:
JNIEnv* env,
jobject classInstance,
For our purposes, we don't really care about these, but the first parameter is a reference to the JVM in which our app is currently running, and the second is the instance of the class that will be calling our code. The next parameter will be the only one we define in the JVM code:
jdouble celsius
The actual body of the function is quite simple, and merely performs the conversions from Fahrenheit to Celsius or vice-versa. Let's move on to the Java and Kotlin implementations, respectively.
Step 3: Implement the Java Code
For simplicity, and because there's no state involved here, I'm just using static classes/methods:
// Java Implementation
package com.wbrawner.cverter;

public class ConversionHelper {
    static {
        System.loadLibrary("c-verter");
    }

    public static native double celsiusToFahrenheit(double celsius);

    public static native double fahrenheitToCelsius(double celsius);
}
Keep in mind that the package is important. It must match the C method names exactly or this won't work. The same is true of the class and method names, along with their parameter types, counts, and order. Most of this is standard stuff so I'll just go over the native-specifics.
static {
    System.loadLibrary("c-verter");
}
As soon as the JVM loads this class into memory, we'll want to load the native library. You do this with the System.loadLibrary() method. You'll pass the same name for your library that you defined in the CMakeLists.txt file previously, as a String. Next, the function declarations:
public static native double celsiusToFahrenheit(double celsius);
Notice the native keyword in the method declaration, and the lack of a function body. This tells the JVM that the method is implemented in a native language, and that it'll need to check the library we've loaded in order to get the implementation. Again, keep in mind that the signatures must match between the JVM declaration and the C declaration.
Step 3 (Alt): Implement the Kotlin Code
In Kotlin, rather than using a class, I'm using an object, since again I don't need an instance of this wrapper class to hold any state:
// Kotlin Implementation

package com.wbrawner.cverter

object ConversionHelper {
    external fun celsiusToFahrenheit(celsius: Double): Double

    external fun fahrenheitToCelsius(fahrenheit: Double): Double

    init {
        System.loadLibrary("c-verter")
    }
}
Much like in Java, the package is important, as are the class name and method declarations. There are only a few minor differences in syntax but otherwise everything is the same.
external fun celsiusToFahrenheit(celsius: Double): Double
Instead of the native keyword, Kotlin uses the external keyword.
init {
    System.loadLibrary("c-verter")
}
Also, instead of loading the library in a static initializer block, Kotlin uses the standard init block. If you did need an actual class to hold state, you could also put this in the init block for your class' companion object.
Step 4: Use the C Code in your App
Now that we've done the setup, let's create a super simple app to demonstrate the code in action! I've created an Activity creatively called MainActivity, along with a layout resource file:
<?xml version="1.0" encoding="utf-8"?>
<LinearLayout xmlns:android="http://schemas.android.com/apk/res/android"
    xmlns:app="http://schemas.android.com/apk/res-auto"
    xmlns:tools="http://schemas.android.com/tools"
    android:layout_width="match_parent"
    android:layout_height="match_parent"
    android:orientation="vertical"
    android:gravity="center"
    tools:context=".MainActivity">

    <TextView
        android:id="@+id/celsiusToFahrenheit"
        android:layout_width="wrap_content"
        android:layout_height="wrap_content"
        tools:text="Celsius to Fahrenheit conversion" />

    <TextView
        android:id="@+id/fahrenheitToCelsius"
        android:layout_width="wrap_content"
        android:layout_height="wrap_content"
        tools:text="Fahrenheit to Celsius conversion" />

</LinearLayout>
–
// MainActivity.kt
package com.wbrawner.cverter

import androidx.appcompat.app.AppCompatActivity
import android.os.Bundle
import kotlinx.android.synthetic.main.activity_main.*

class MainActivity : AppCompatActivity() {
    override fun onCreate(savedInstanceState: Bundle?) {
        super.onCreate(savedInstanceState)
        setContentView(R.layout.activity_main)
        celsiusToFahrenheit.text = String.format(
            "40℃ is equal to %3.0f℉",
            ConversionHelper.celsiusToFahrenheit(40.0)
        )
        fahrenheitToCelsius.text = String.format(
            "40℉ is equal to %2.1f℃",
            ConversionHelper.fahrenheitToCelsius(40.0)
        )
    }
}
The premise of the app is simple: display a conversion of Celsius to Fahrenheit on one line, with the opposite conversion on the bottom, using our C library to handle the conversions. If you build and run the app, you get something that looks like this:
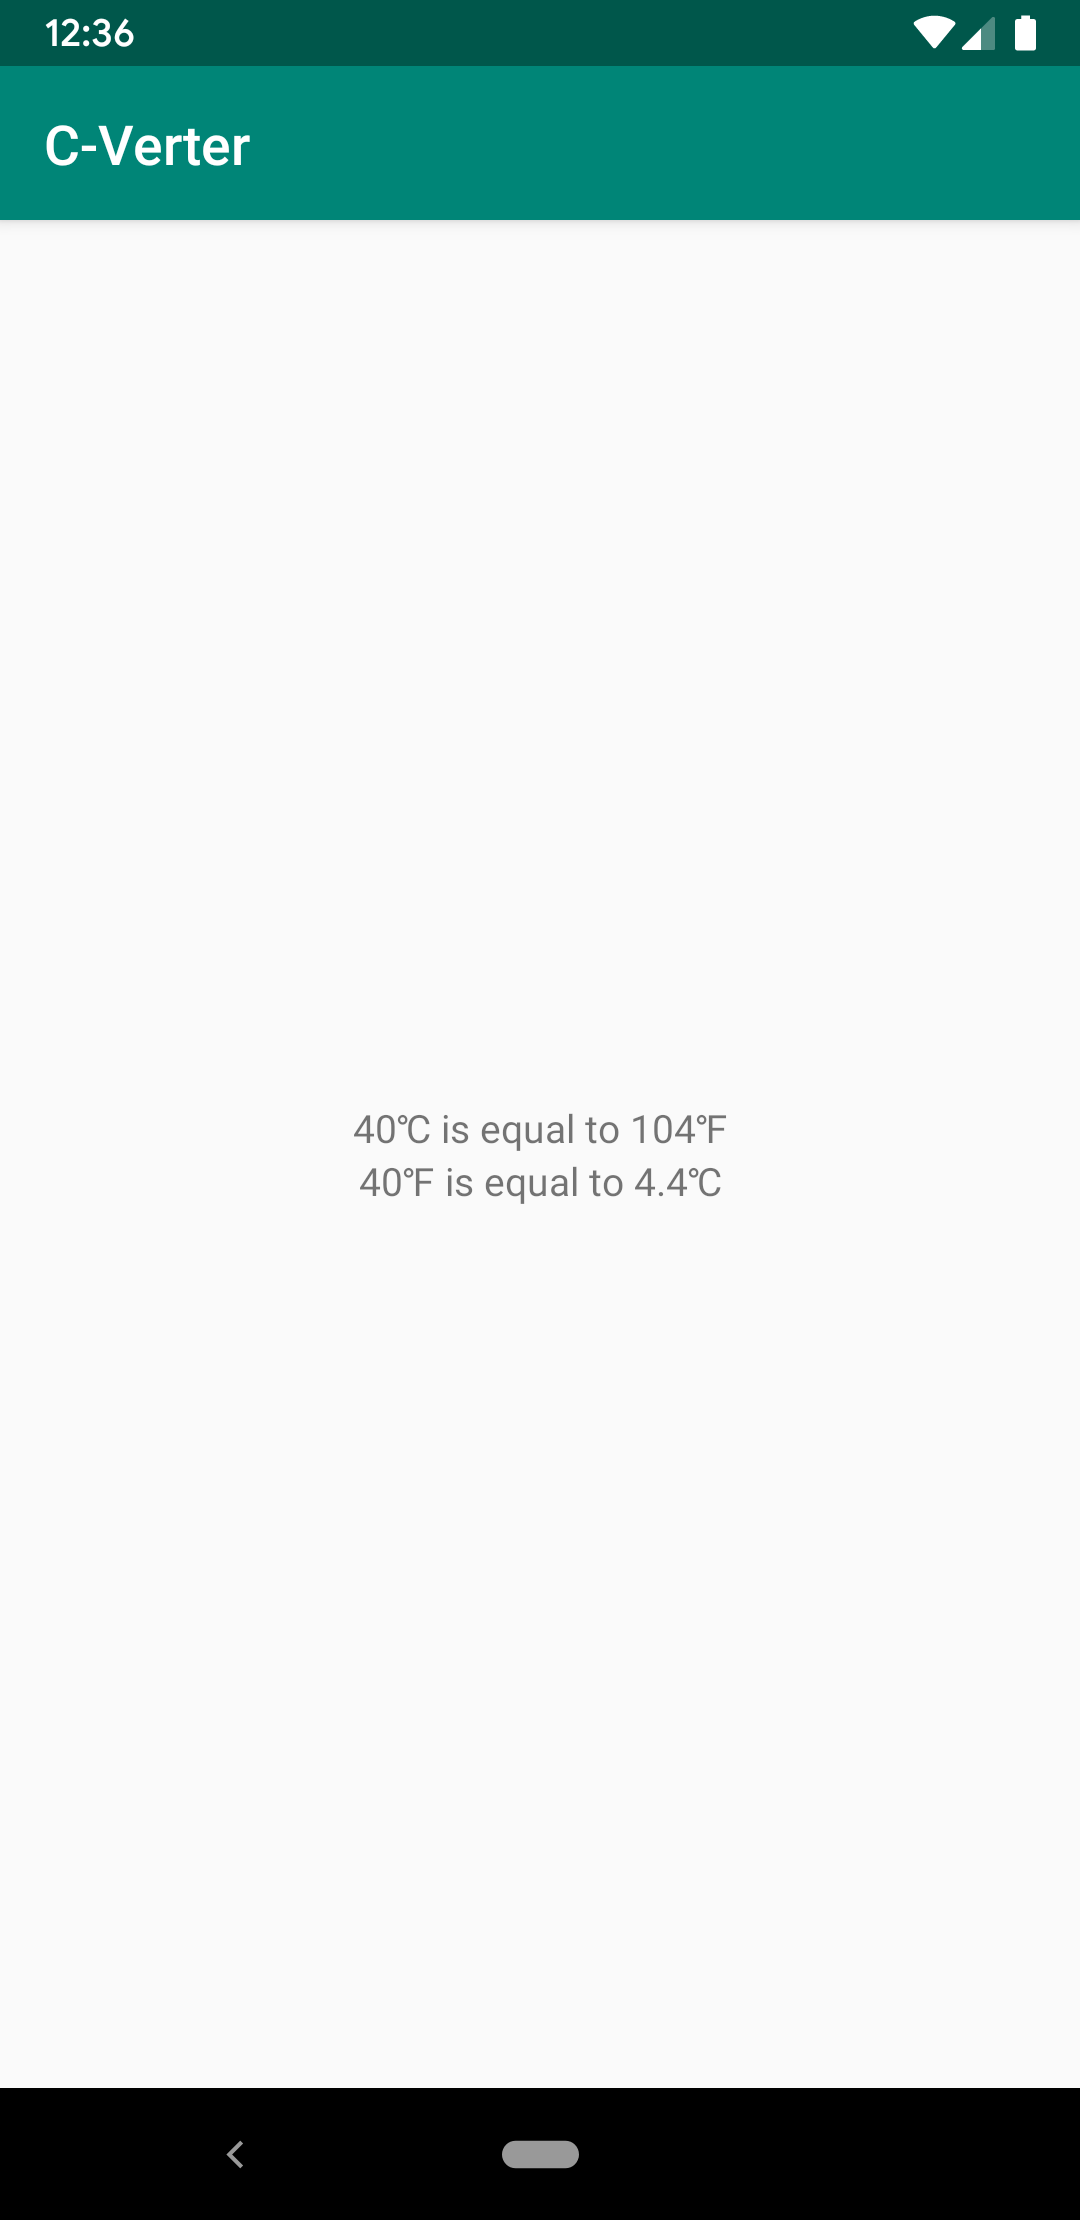
Mission accomplished!
Why Would I Want to Do This?
There are several reasons why you might want to (or might not want to) integrate some C code in your app. If performance is crucial or you want to share some complex logic between Android and another platform, or you need to leverage some existing C library, then you might find this useful. I'd caution you to ensure that this is the best option though, as cross-platform solutions can often be more complicated and expensive in the long run, as Dropbox found out with C++ and Airbnb did with React Native. As always though, you should weigh the pros and cons and find out what works best for you. Happy coding!